Basic sqlite programming in Android
What we want to do;
- Learn to open or create a sqlite3 database programmatically
- Learn to view the contents of a sqlite database in the adb shell
- Learn the various objects that are needed to create a database, create a table, save a record to a table and read records from a table
- Learn to use the scrollview
1. Create a project with an empty activity,
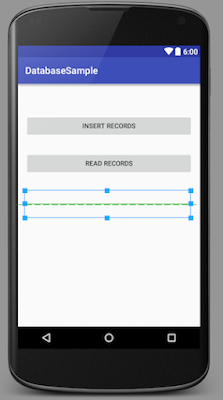
Named the project “databasesample”. Add two buttons, a scrollview and a textview. The textview should be nested inside the scrollview.
Parts of the main activity xml is shown below. Take care that the textview is nested inside the scrollview. When the number rows in the database table exceeds the height of the textview, some records will not be visible. The textview does not have a scrollable viewport, but the scrollview has. That is the reason we embedded the textview inside a scrollview.
<RelativeLayout>
  <ScrollView
    android:layout_width="match_parent"
    android:layout_height="wrap_content"
    android:id="@+id/scrollView"
    android:layout_centerVertical="true"
    android:layout_alignParentStart="true">
    <TextView
      android:layout_width="match_parent"
      android:layout_height="wrap_content"
      android:id="@+id/textView"
      android:layout_below="@+id/scrollView"
      android:layout_toEndOf="@+id/textView"
      android:layout_marginTop="44dp"/>
    </ScrollView>
</RelativeLayout>
2. Create some private members of the main activity class
public class MainActivity extends AppCompatActivity {
  String DB = "mydb";
  SQLiteDatabase db = null;
  TextView tv = null;

  String stmt1 = "CREATE TABLE IF NOT EXISTS MyTable (lastname VARCHAR, firstname VARCHAR, email VARCHAR)";
  String stmt2 = "INSERT INTO MyTable VALUES ('Doe', 'John', 'jdoe@gmail.com')";
  String stmt3 = "INSERT INTO MyTable VALUES ('Gosling', 'James', 'jgosling@sun.com')";
  String stmt4 = "INSERT INTO MyTable VALUES ('Ritchie', 'Dennis', 'dmr@belllabs.com')";

}
The variables mydb, db and tv will be accessed later by the methods createRecords and readRecords, that is the reason why they needed to be defined as top level class members.
3. Implement the onCreate method of the main activity.
Add event listeners for the buttons “Read records” and “Insert records”.
    Button btnCreate = (Button) findViewById(R.id.insertButton);
    Button btnRead = (Button) findViewById(R.id.readButton);
    tv = (TextView) findViewById(R.id.textView);
    assert btnCreate != null;

    btnCreate.setOnClickListener(new View.OnClickListener() {
      @Override
      public void onClick(View v) {
        createRecords();
      }
    });
    assert btnRead != null;
    btnRead.setOnClickListener(new View.OnClickListener() {
      @Override
      public void onClick(View v) {
        readRecords();
      }
    });
4. Implement the createRecord method
  private void createRecords() {
    db = openOrCreateDatabase(DB, MODE_PRIVATE, null);
    db.execSQL(stmt1);
    db.execSQL(stmt2);
    db.execSQL(stmt3);
    db.execSQL(stmt4);
    db.close();
  }
5. Verify creation of the database using the android device monitor

6. Inspect contents of the database using the adb shell
adb shell

# sqlite3 /data/data/com.example.ted.databasesample/databases/mydb
sqlite> .databases
sqlite> .tables
sqlite> .schema MyTable
sqlite> SELECT * FROM MyTable;
sqlite> .quit
7. Implement the readRecords method
  private void readRecords() {
    StringBuilder sb = new StringBuilder();
    db = openOrCreateDatabase(DB, MODE_PRIVATE, null);
    Cursor c = db.rawQuery("SELECT * FROM MyTable", null);
    //c.moveToFirst();
    while (c.moveToNext()) {
      /*   System.out.println(c.getString(c.getColumnIndex("lastname")));
    System.out.println(c.getString(c.getColumnIndex("firstname")));
System.out.println(c.getString(c.getColumnIndex("email")));
      */
      sb.append(c.getString(0) + " , " + c.getString(1) + " " + c.getString(2));
      sb.append("\n");
      tv.setText(sb.toString());
    }
  }